Once you have taken your deer, breaking it down and getting it ready to eat is another challenge. This article will teach you how to successfully dress a deer and keep your freezer stocked.
Steps
Preparing the Deer for Dressing
-
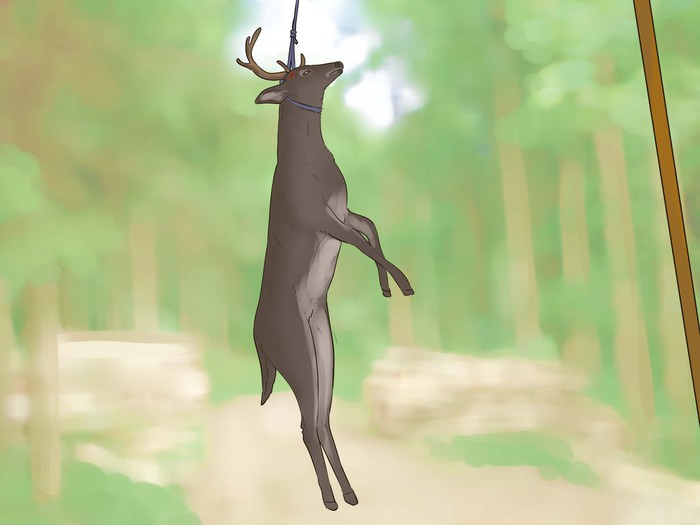
Hang the deer for skinning. Ideally, you may have a camp with a winch and a frame, or a tractor with a lift or bucket to lift the deer up. You will also want plenty of clean water available, preferably from a potable water system with a garden hose and sprayer.
-
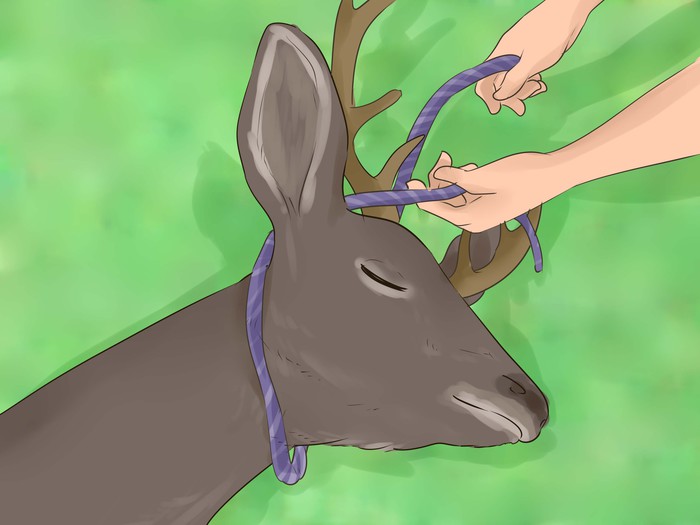
Tie a strong rope or strap around the animal's antlers, or under the head as high up the neck as possible. Some hunters prefer to hang their deer by the achilles tendons with the head down, but generally, the steps are the same.
- Hanging head up makes removing the stomach, intestines, and bladder a bit easier, and is less likely to contaminate the meat when this is done.
Removing the Organs
-
Field dress your deer as soon as possible after you have bagged it. Removing the internal organs and cooling the carcass is essential to keeping the meat from spoiling.
-
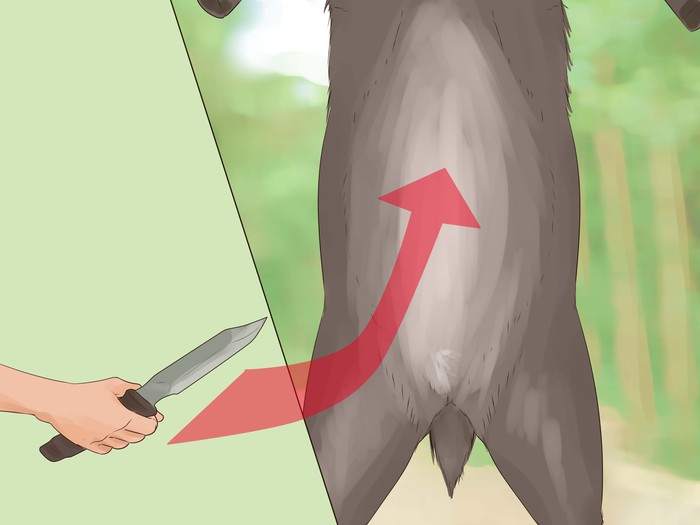
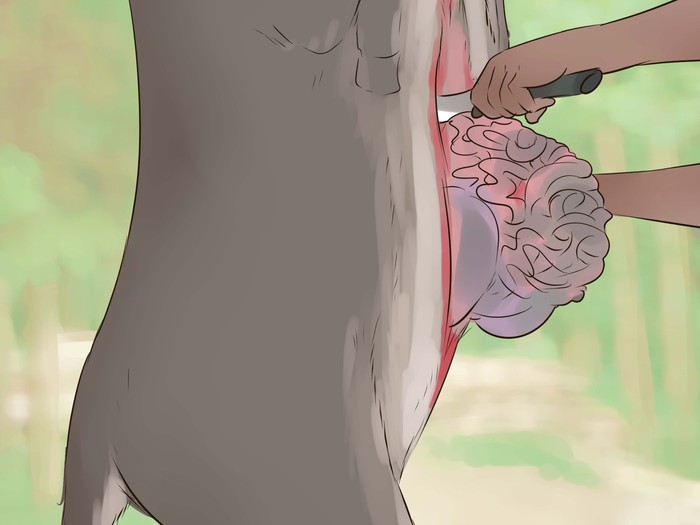
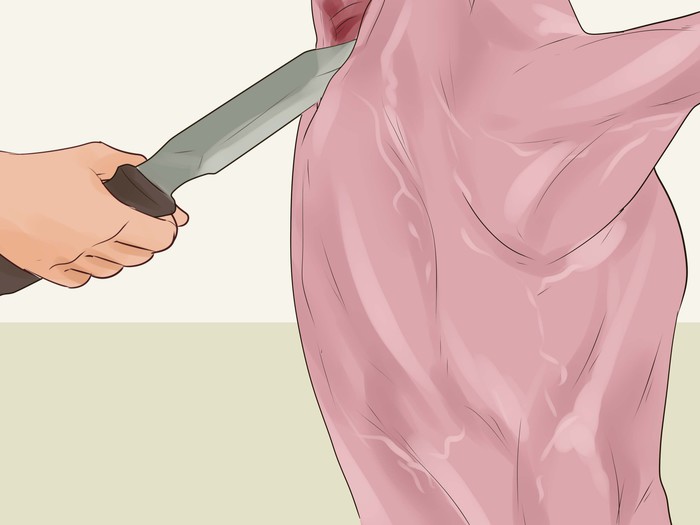
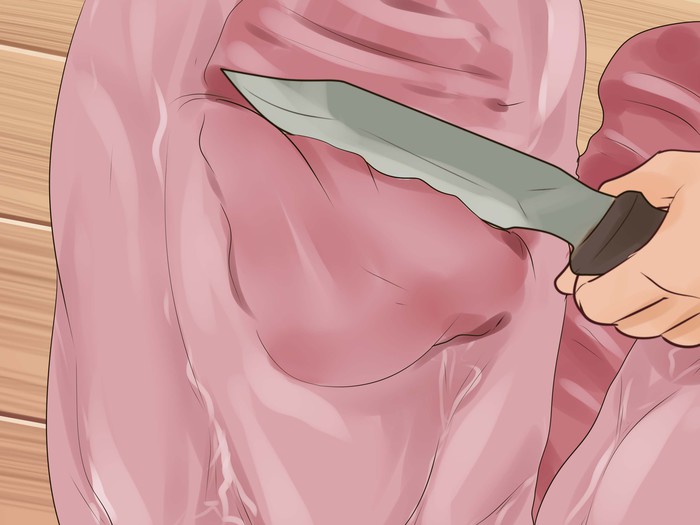
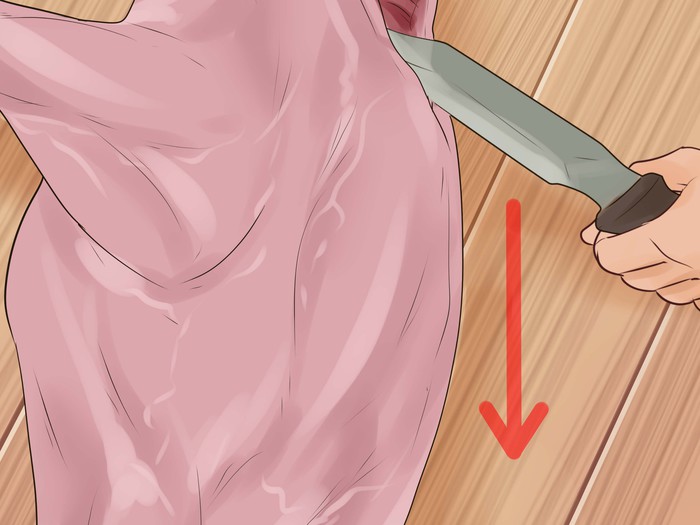
Gut the deer by splitting the stomach membrane, working from the bottom, or pelvis, upward. Allow only the very tip of the knife into the abdomen, so that the stomach and intestines are not ruptured.
-
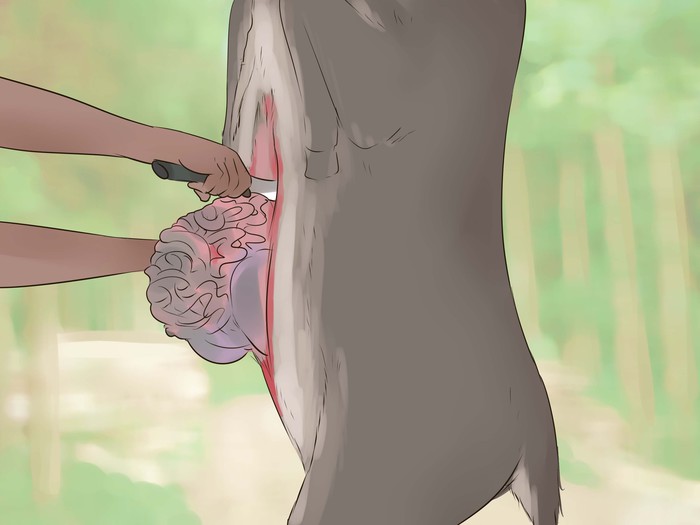
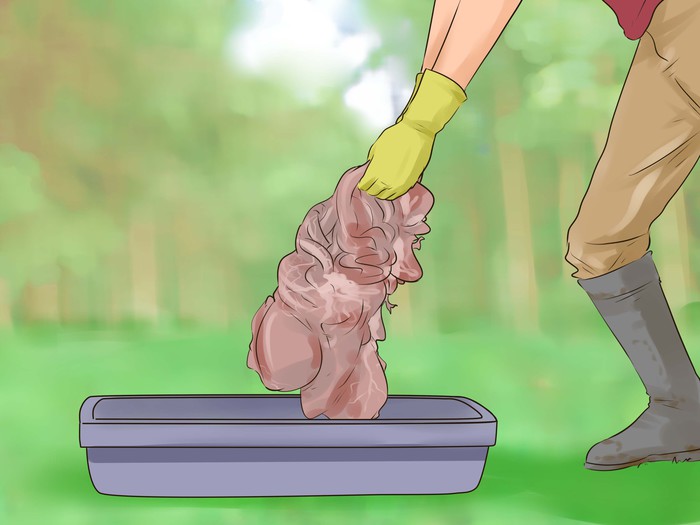
When you have split upward to the base of the sternum, reach into the abdomen and pull out the organs. Having a large container to drop them in will help keep your work area clean.
- Note that the kidneys and liver will usually stay attached by their supporting membranes, but if you plan to save them to eat, be careful they do not spill out with the stomach.
-
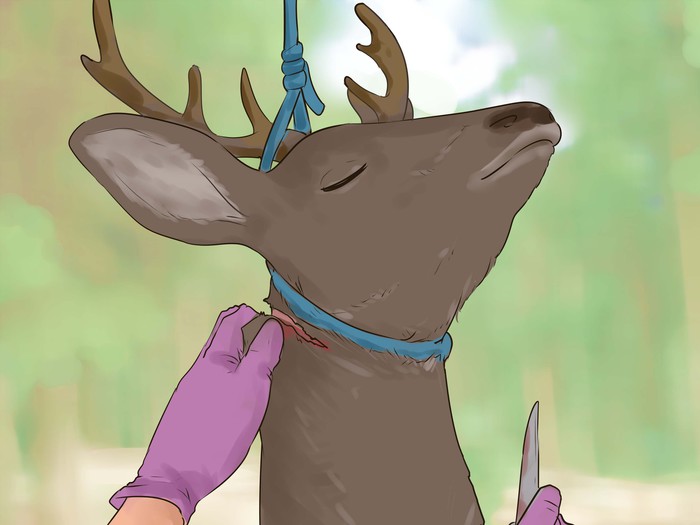
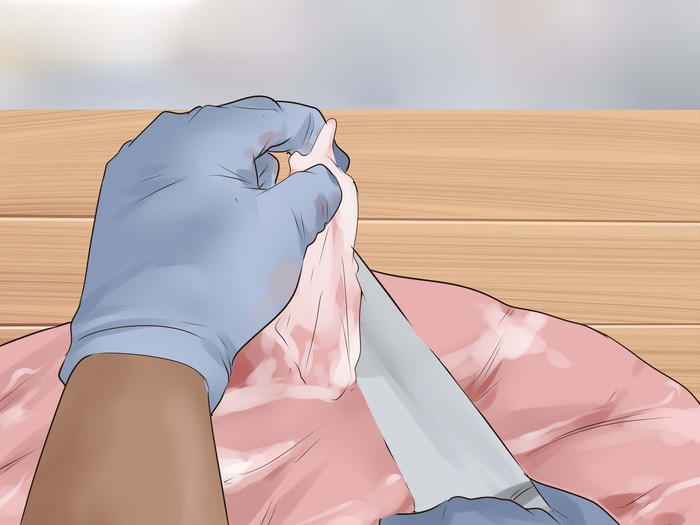
Look for the bladder near the spine in the lower area of the abdomen. It will look like a translucent balloon filled with yellow liquid (urine). You will need to grasp it securely, holding the urethra closed, and cut it free without allowing it to drain.
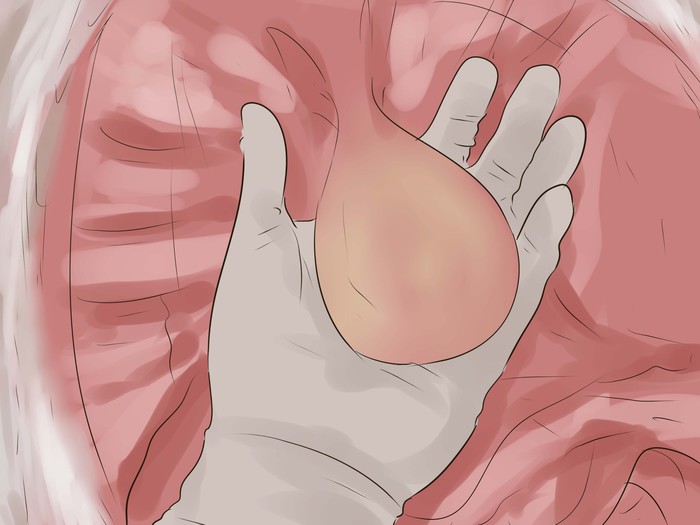
- Try wrapping the bladder in a ziplock bag while it is still attached. Zip up the bag as far as it will go. Then cinch down below where you plan to make your cut with a small rubber band or zip-tie. When you make your cut, the bladder will be safely enclosed in the ziplock, even if you rupture or pierce it, saving the meat.
- Here, having a water hose handy in case of an accident is very helpful.
-
Remove the anus and intestines. With your knife, cut a circle approximately around the anus. Pull out the rectum very gently and tie it shut with a small rubber band or a zip-tie. This will keep any feces from contaminating the meat. Disconnect the connective tissue around the intestines and carefully remove from the body cavity.

-
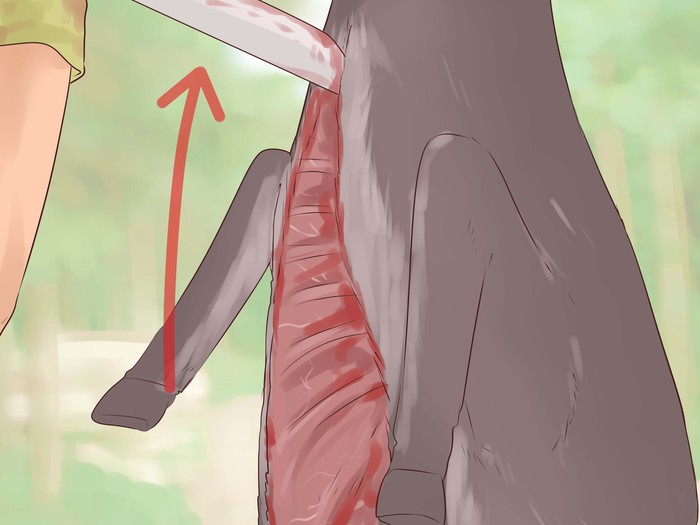
Split the sternum, or center of the ribcage with a large, heavy knife or a saw suitable for this task. Spread the chest open, being careful the heart doesn't drop out if you intend to save it for food. Pull out the lungs and heart, as well as the wind pipe and esophagus, then rinse the body cavity thoroughly.
-
Place any internal organs you plan to eat in a clean bucket or pan and rinse them with cool water. The liver, as well as possibly the heart and kidneys are edible, but will need additional preparation.
-
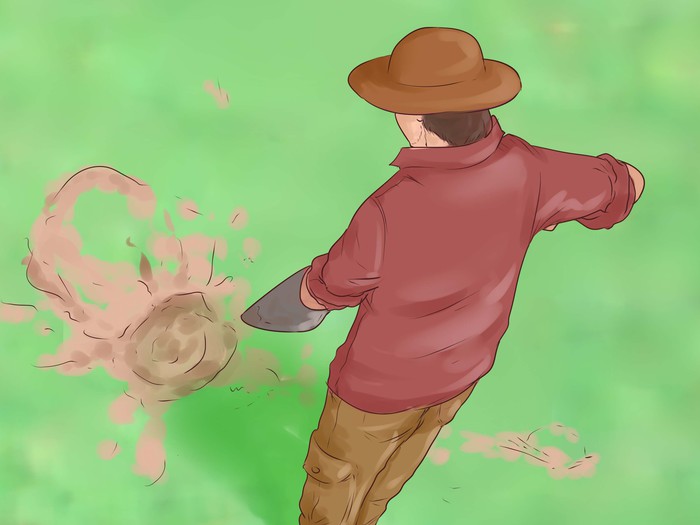
Dig a deep hole to dispose of the remnants of the cleaning process. Your local Fish and Wildlife service may have a disposal area to save you this step.
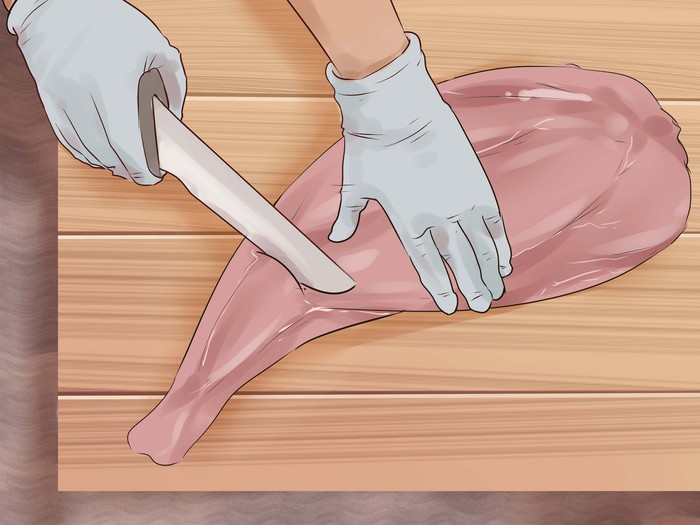
Skinning the Deer
-
Start by removing each of the hooves at the elbow. With the point of your knife, find the joint and make an incision. Then, move your knife around the joint with the flat of the blade, cutting the ligaments and carefully working your knife around the elbow joint as deeply as possible. Twist the joint firmly and snap it off.

-
Begin cutting through the skin at the base of the animal's skull. Next, cut around it the base of the neck, then down towards the breastbone, and finally to the stomach, pelvis and the forelegs.
- Take care to cut only the skin, and not the muscles or abdominal tissues, as hair will contaminate the meat in these areas.
-
Begin pulling the skin off the shoulders and neck, working your way downward toward the chest.

- If muscle tissue is pulling loose with the skin, scrape or slice through it so it doesn't tear loose as you go. Slicing the subcutaneous membranes will make the skin easier to pull free.
-
Pull the skin off the carcass, either with a vehicle or by hand.
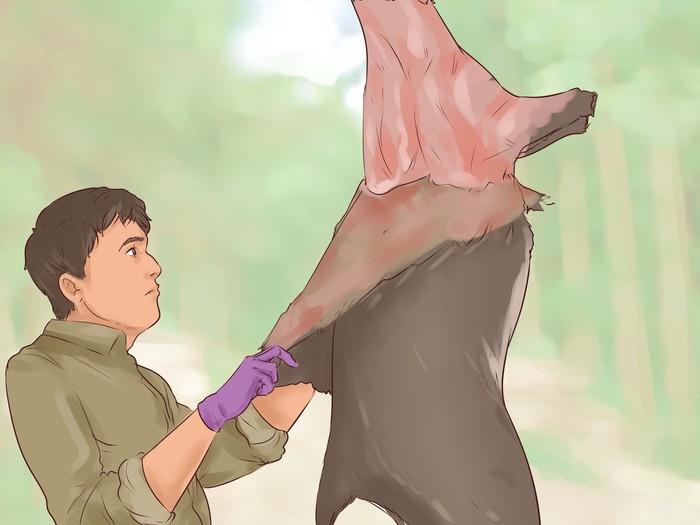
- If skinning by hand, pull the skin down a bit, then slice the tissue that attaches it to the muscles underneath it, working a little at a time.
- If you want to save energy and use a four wheeler or even a truck, you can tie a golf ball or a similarly sized stone under the skin, looping your rope around it, then tie the free end to the vehicle. Drive slowly away from the carcass, pulling the remaining skin from the deer with very little effort.
-
Remove the head. Take the deer down and lay it out on a flat work surface. Just under the jaw, cut the ligaments to loosen the connective tissue around the neck. You'll need to twist the head sharply to break the neck and remove the head completely.
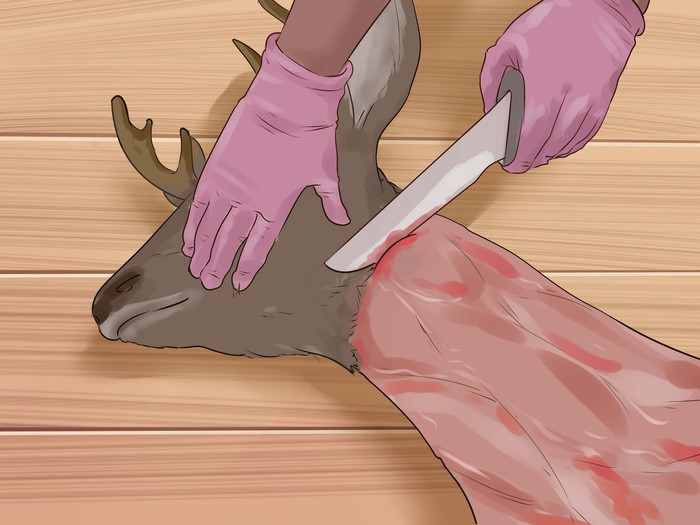
- If you want to save the antlers, but not the head, you'll need to use a saw to remove a portion of skull about an inch from the base of the antlers.
- If you want to save the entire head, keep it cool and skin (see below) it. Save any meat from the skull you wish to keep and boil the skull for several hours, removing the tissue and bleaching the skull. Clean it afterward with hydrogen peroxide to get it white.
-
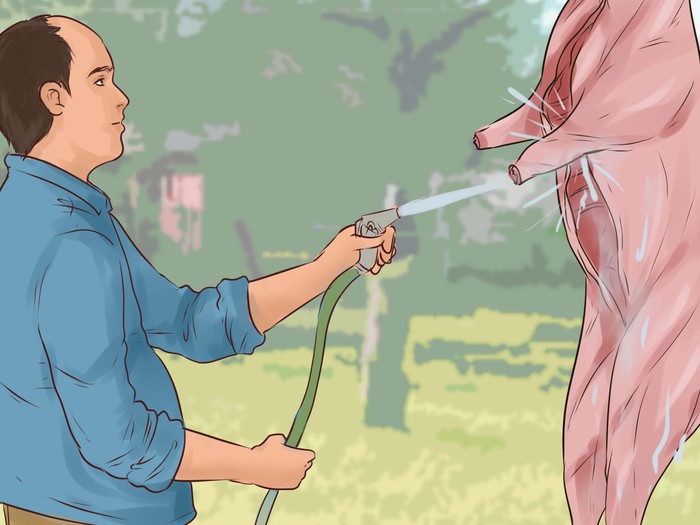
Rinse the deer's carcass after the skin is removed. This will wash away any hair that has stuck to the meat and will also help cool the meat while you are completing the job. If you plan to have your deer commercially processed, it's ready to go to the processor after removing the organs. If you want to break it down yourself, let it cool thoroughly and take it indoors or to a clean cutting surface on which you can work.

Aging the Meat
-
Wash the venison with plenty of cold water, then transport it with ice. Do not wrap it with cling wrap or butcher paper at this point, which will trap heat in the meat and promote spoilage. Make sure the carcass is cool and dry. As soon as possible, the meat needs to be transported and stored at .
- Avoid freezing the meat right away, as freezing will inhibit the aging process and speed its spoiling after the meat is thawed.
-
Find a suitable location for aging. The most difficult part of the process is finding a space big enough for your deer that can be temperature controlled. The most popular location is generally a garage, shed, or an outbuilding. Places that receive some heat seepage from the house, like a garage tend to be particularly effective.
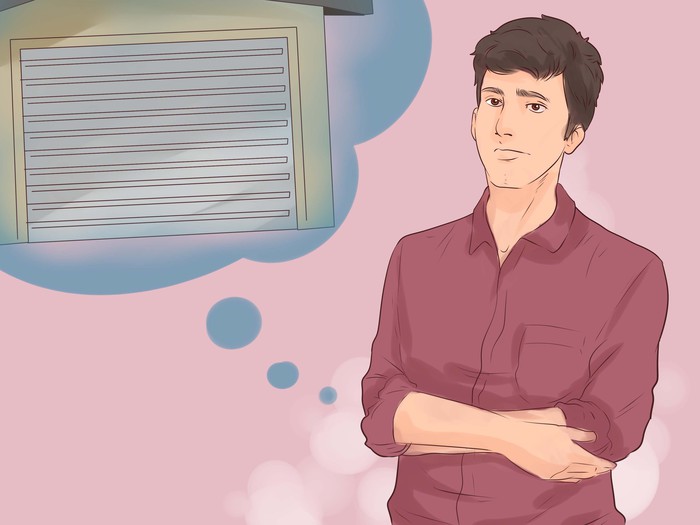
- If you don't have a garage, talk to friends and other hunting acquaintances to find a suitable location. Or follow the first few steps of the breaking down process to quarter the meat and age it in a spare refrigerator. The quarters from an average deer should fit in a standard fridge.
- Err on the side of too cold. Generally, you'll freeze at least some of the meat after breaking it down anyway. Be very careful not do let your venison spoil by aging it above . Make sure to keep a thermometer in your aging space.
-
Hang the carcass. Use a meat hook and chain or rope to affix the meat to a sturdy rafter in your aging location.
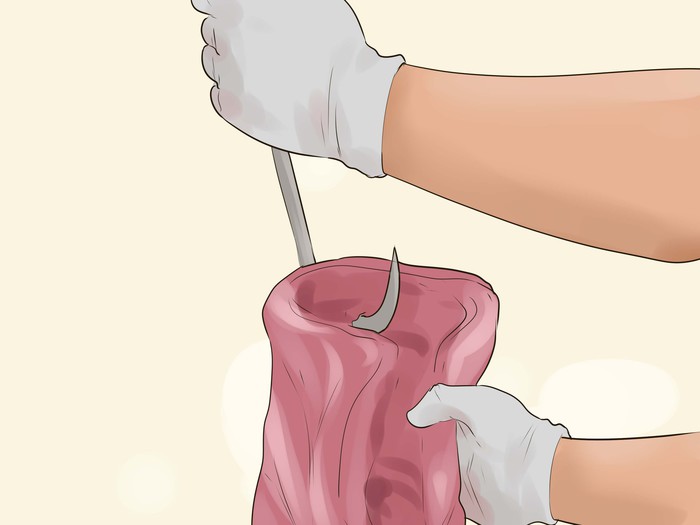
- If you don't have a meat hook, try using an old wire hanger inside the carcass to hang the deer.
-
Age the meat for at least a week. Like beef, aging the meat causes the collagen in the muscle cells to break down. The quality and flavor of the venison is greatly improved by letting the meat sit for a week in a cool space with good air circulation.
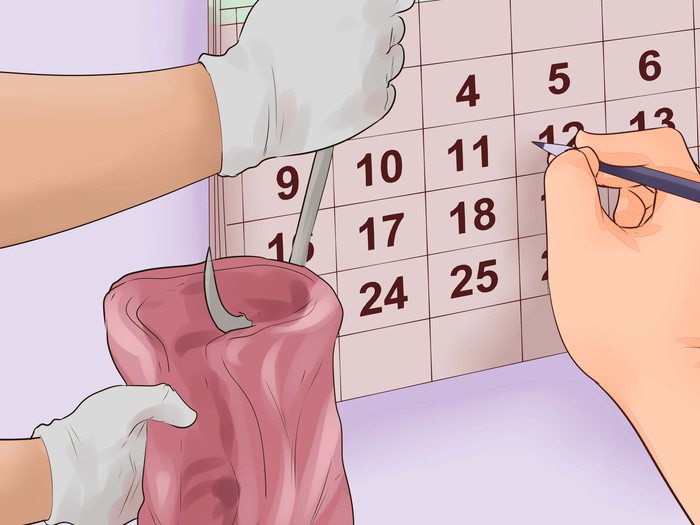
- This causes the surface of the meat to dry, but don't worry--this can be trimmed off during the butchering process.
- The meat will continue to grow more tender for 16-21 days.
Breaking Down the Deer
-
Prepare a clean work surface and assemble your tools. It's helpful to have a large cleaver and a boning knife for this task. Make sure your tools are sharp and clean and that you've got a sterile work surface large enough to handle big pieces of meat.
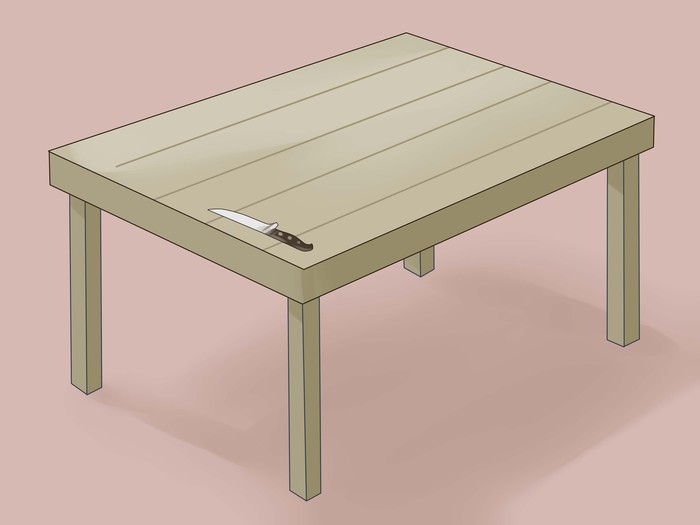
- Try setting up a portable card table or picnic table and cleaning it with food-safe sanitizer before you begin.
-
Split the backbone to separate the chuck meat (front quarters) from the round (hind quarters). Using a saw or a meat cleaver, find the point at which the rib cage meets the backbone (it should be between the 12th and 13th rib) and cut through the spine. Use firm pressure.
- After you've made an incision, you may need to put one hand on the hind quarters and one hand on the for legs or neck area and bend them toward each other to break the back in half.
-
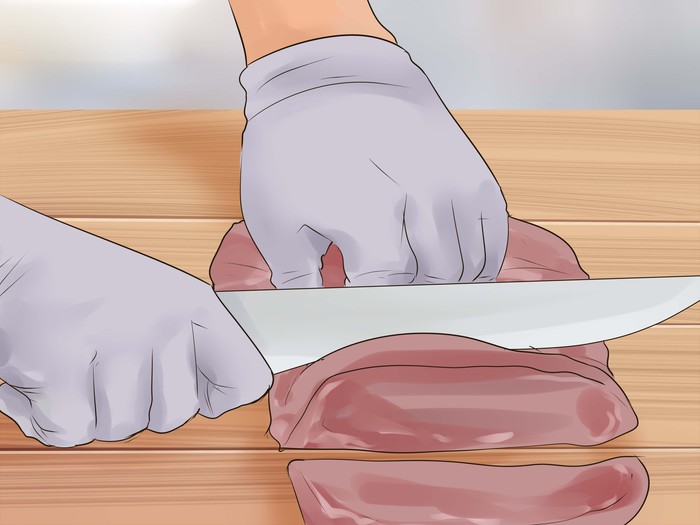
Remove the backstraps and tenderloins. Probably the most tender and tasty cut of venison, the tenderloins are the dark, lean, red meat found inside the cavity, running alongside the backbone. The backstraps or ribeye are also called the "outside tenderloins," and are found opposite the tenderloin, along the backbone on the other side of the ribs.
- To remove them, run your knife along the inside of the backbone (for the tenderloin) or the outside of the backbone (for the backstraps), and work the meat loose of the ribs and keeping the edge of your knife as close as possible to the bone, to get as much of the meat as possible. Use long even cuts as you pull the meat away from the bone.
- You'll find these in both the hind quarters and rib section of the carcass.
- This is the best cut for steaks or roasts.
-
Saw through the ribs, cutting them all the way down the backbone, near the spine. You can either separate the ribs, or leave them intact as whole side of ribs. The brisket can be found on the outside of the ribs, near where you've opened the belly for removing the organs.
- Alternatively, you can leave the entire backbone area intact for cutting into chops with a meat saw later. To do this, leave the tenderloins and backstraps in place, and remove the upper shoulders by cutting the muscles that attach them to the chest, working from the bottom (the armpit) up, lifting on the leg as you do so. Since there are not joints in the bones connecting the front shoulders to the chest, a good, sharp knife is all you will need.
-
Remove the shoulder and neck meat. Many people do not realize how much meat a deer's neck has in it. This meat isn't as good for steaks, but is ideal for grinding into sausage or cubing for stew meat. Work your knife around the shoulder joint, twisting the arm away from the body as you loosen it.

-
Separate the hams from the hock joints. The hams of the deer are the fatty meat found around the back hips or the rump of the deer, and the hocks are the remaining leg meat above the joint where you removed the hooves. Ham's make decent steaks and hocks are good for stewing.
- If you want to leave the bone in, cut the hindquarters from the deer by sawing through the pelvic bone on either side of the spine, then separate the ham from the hock by cutting through the joint.
- If you want to remove the hams from the bone completely, work the hind legs off the hip by working your knife into the ball and socket joint, lifting the leg away from the carcass as you work. Next, position the ham at a perpendicular angel and about from the top, perpendicular to the leg bone, and cut straight down through the ham. Cut the meat from the leg bone by shifting your knife parallel to the bone. You can immediately cut this meat into steaks or leave it whole for stewing or roasts.
Step Six: Storing the Meat
-
Prepare it for freezing. With a very sharp boning knife, remove fat, cartilage, and any bruising, discoloration and dry spots that result from the aging process. Much of the toughness or undesirable gaminess negatively associated with venison can be lessened by removing these parts.
-
Make the cuts you'll want to eat. The meat is at the perfect stage for butchering, which will also save time down the road when you're ready to defrost it and get cooking.
- If you have a meat grinder, take this opportunity to grind the neck and flank muscles for sausage or ground venison. Cube the shoulder meat for stewing or leave it whole for slow roasting. Cut steaks 3/4 of an inch thick, across the grain.
-
Freeze the meat. In labeled meal-sized portions, pack the meat into plastic freezer bags. Squeeze as much of the air as possible out of the bags and that the bags are sealed tightly before placing them in the freezer.

- Don't forget to date the meat. Meat prepared this way should remain good for at least a year.
Tips
- The instructions regarding skinning the neck and shoulders are not meant to be used if the deer is to be caped for mounting.
- Keep your knives and saw sharp and clean while working. This makes the job go much more quickly.
Warnings
- Many areas have deer which may carry diseases and parasites that can be harmful to humans, so wearing safety glasses and gloves is recommended.
Things You'll Need
- Ropes
- Truck or four wheeler for lifting the deer
- Clean water
- Containers for the venison, as well as the waste
- Table (optional) if the venison is to be deboned
- Very sharp knife
- Saw
- Clippers